 DSP configuration
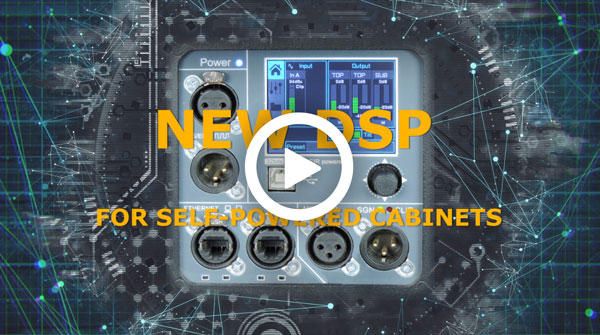
DSP module configuration panel
On the back pannel of the cabinet you will find the digital control area. From the compact joystick located below the screen you are able to configure the basic adjustment functions of the internal DSP.
Just move the joystick to select the icons on the left of the screen. You can enter into the following functions: Home, settings, folder, configuration and information. Please note that you must apply the desired configuration in each one cabinet and requires electrical power to work.
If changes are not made the display will automatically dim to avoid unnecessary light in situations where light is not wanted. To re-activate the light simply press the joystick.
The following screens are an example and may vary slightly for each cabinet.
Configuration panel:
 |
HOME On the main screen you can see the cabinet’s input and output: • Input: You can see a vumeter with the input level and a clip signal. • Output: You have a vumeter with the output level (0 dBu is the amp’s maximum level) You can check the compressor and control the dynamic activity. |
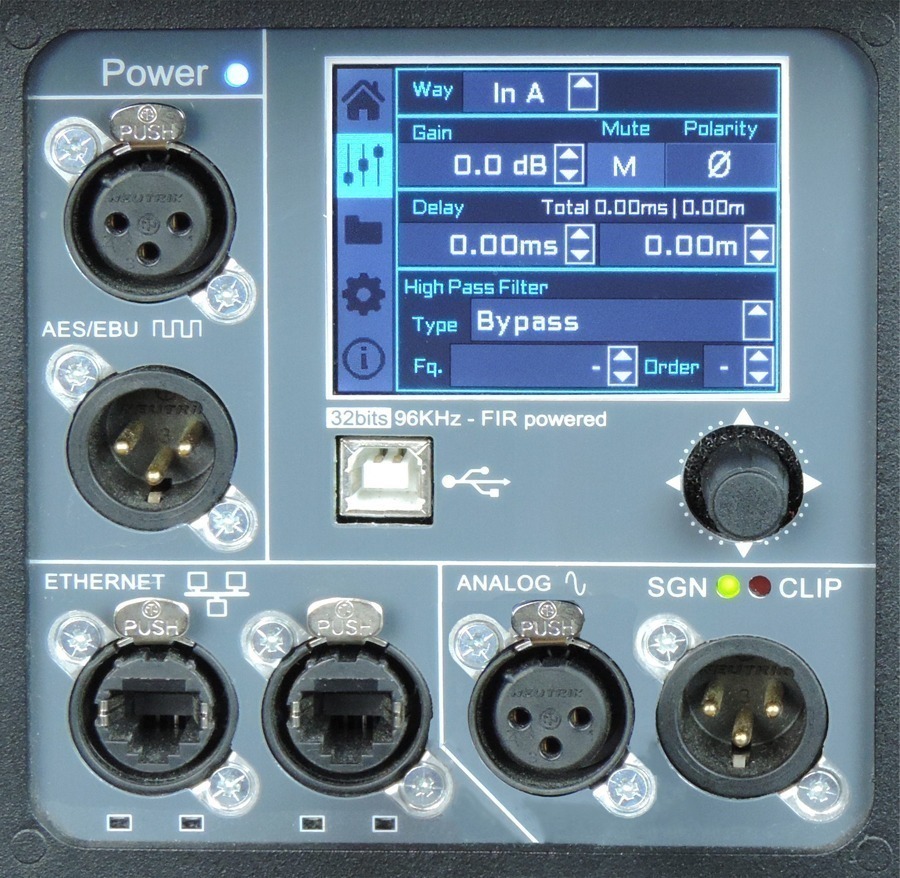 |
SETTINGS This panel allows you to change the gain, polarity, mute and the delay for the inputs. You also have the possibility of putting a high pass, changing the type of filter, frequency and order.
|
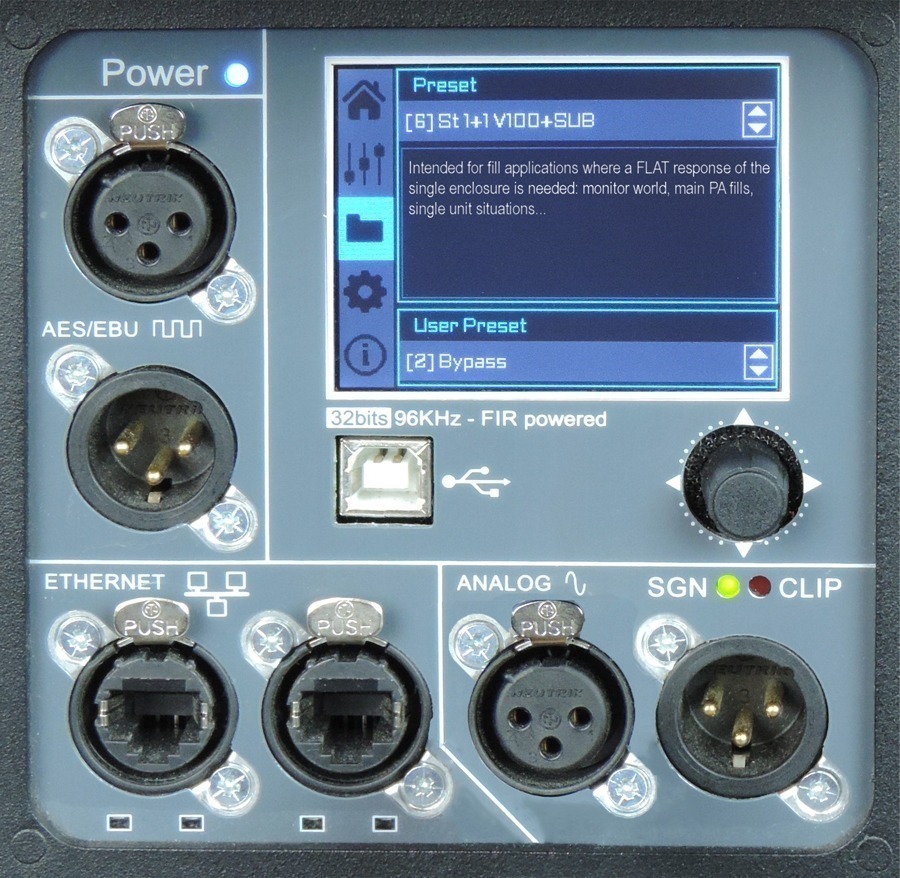 |
FOLDER The folder screen shows you the name of the preset and its description. Using the joystick you can change the preset. |
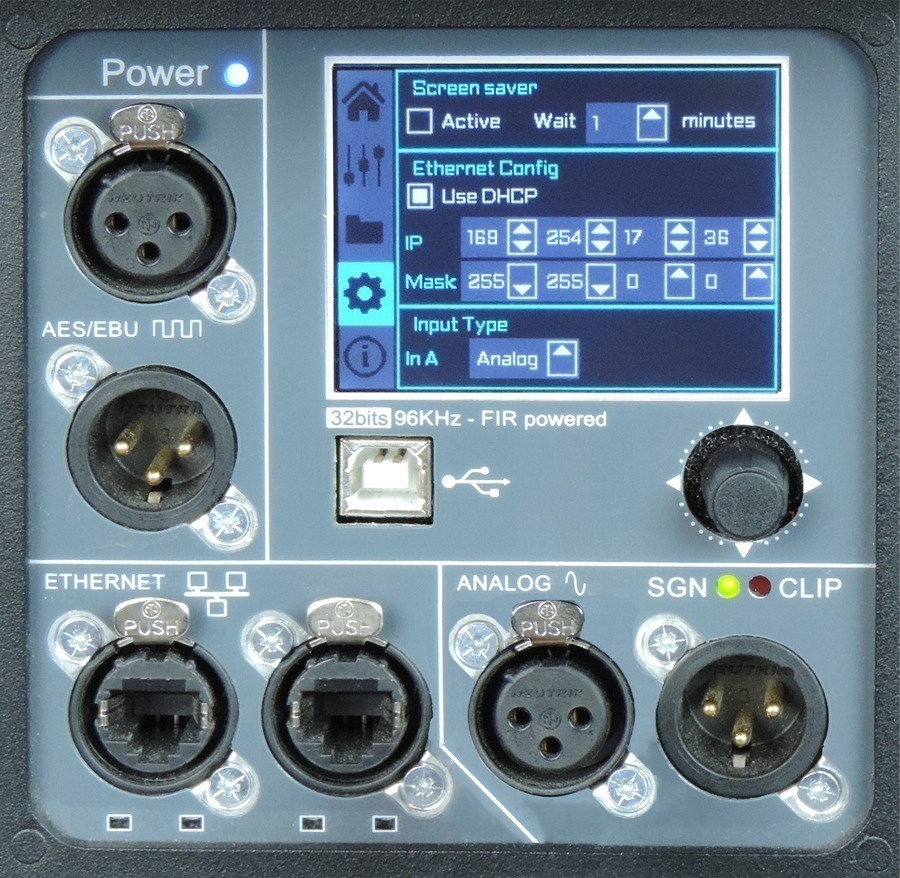 |
CONFIGURATION This screen is to configurate Ethernet. You can choose automatic or manual. You can also configure the screen saver. And here you have the input selection. You can choose between analog or AES3 for channel 1 or channel 2. |
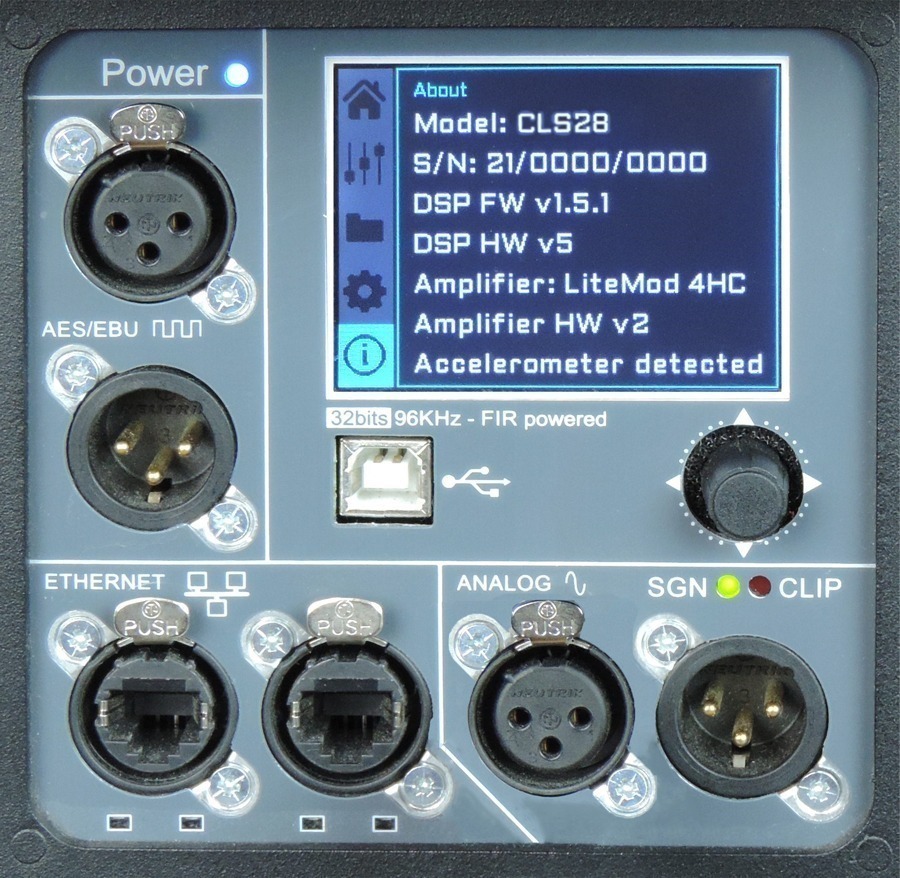 |
INFORMATION The last screen shows you some general information regarding the cabinet’s components. Here you can see the cabinet model, its serial number, DSP firmware and hardware versions, amp module model with hardware version, as well as the accelerometer status. |
Watch the following TUTORIAL to understand how it works:
DSP module configuration panel
On the back panel of the cabinet you will find the digital control area. From the compact joystick located below the screen you are able to configure the Basic adjustment functions of the internal DSP.
Just move the joystick to select the icons on the left of the screen. You can enter into the following functions: Home, settings, folder, configuration and information. Please note that you must apply the desired configuration in each one cabinet and requires electrical power to work.
If changes are not made the display will automatically dim to avoid unnecessary light in situations where light is not wanted. To re-activate the light simply press the joystick.
The following screens are an example and may vary slightly for each cabinet.
HOME
On the main screen you can see the cabinet’s input and output.
• Input: You can see a vumeter with the input level and a clip signal.
• Output: You have a vumeter with the output level (0 dBu is the amp’s maximum level) You can check the compressor and control the dynamic activity.
SETTINGS
This panel allows you to change the gain, polarity, mute and the delay for the inputs.
You also have the possibility of putting a high pass, changing the type of filter, frequency and order.
FOLDER:
The folder screen shows you the name of the preset and its description.
Using the joystick you can change the preset.
CONFIGURATION:
This screen is to configurate Ethernet. You can choose automatic or manual. You can also configure the screen saver.
And here you have the input selection. You can choose between analog or AES3 for channel 1 or channel 2.
INFORMATION:
The last screen shows you some general information regarding the cabinet’s components.
Here you can see the cabinet model, its serial number, DSP firmware and hardware versions, amp module model with hardware version, as well as the accelerometer status.
Watch the following TUTORIAL to understand how it works: