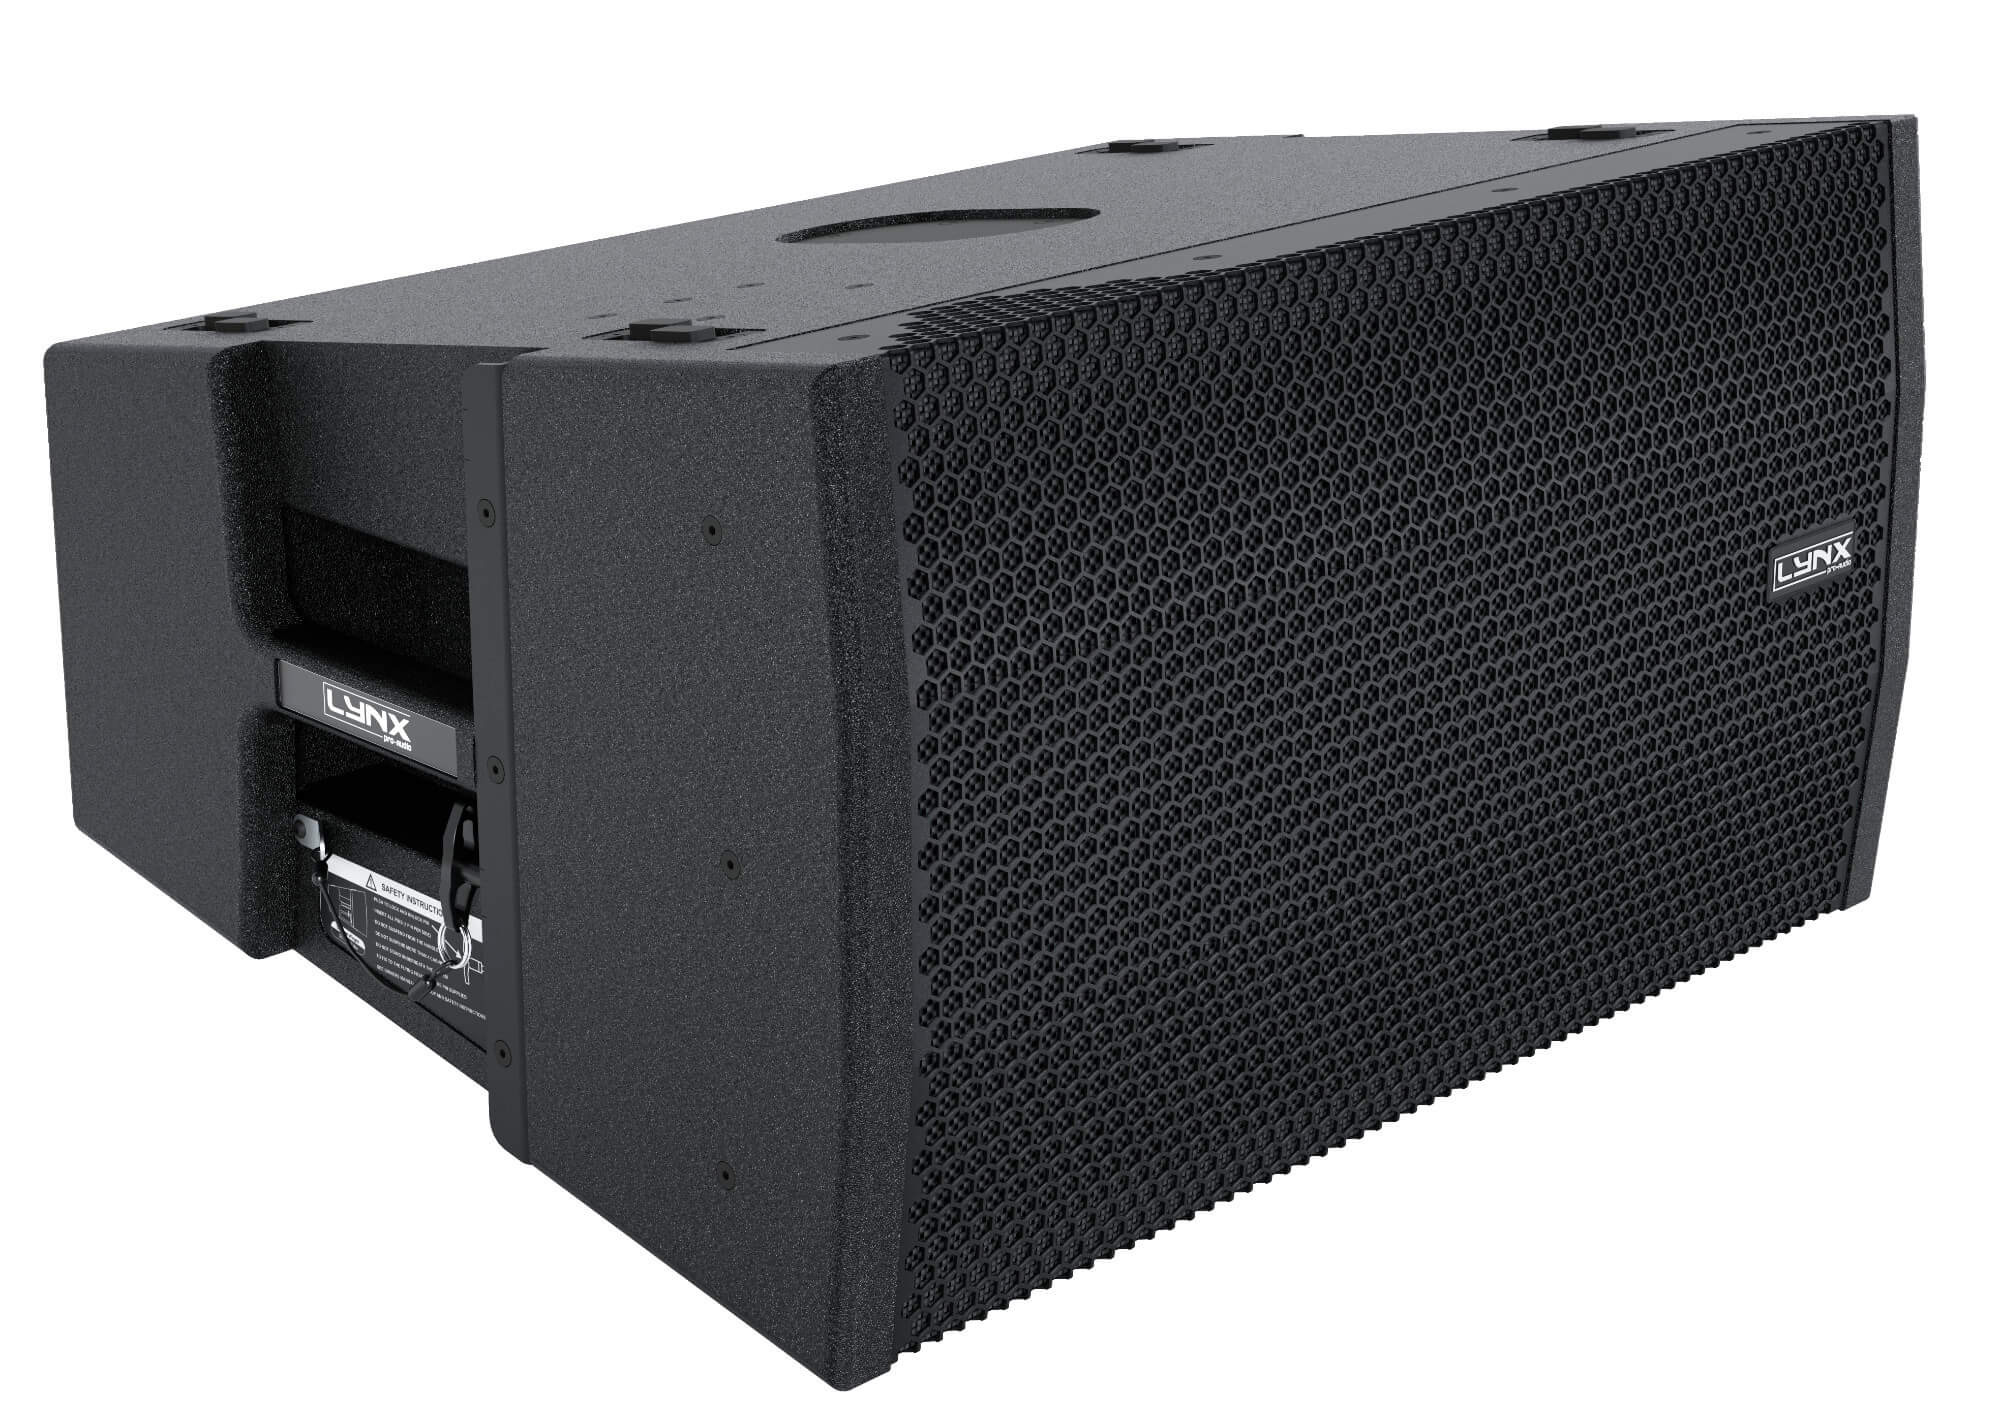
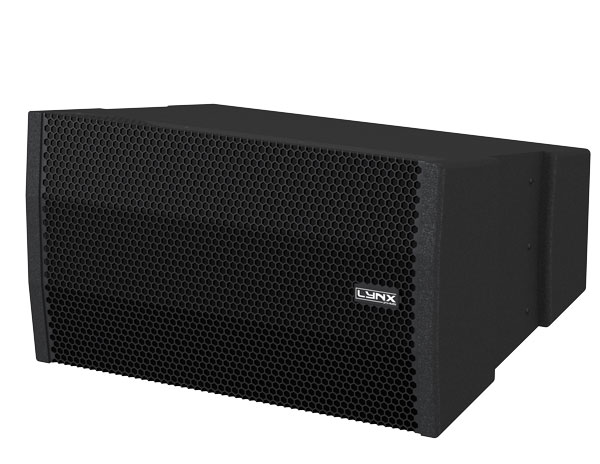
CXA-12
Constant curvature line source
High Output, self powered (class D switch mode power supply with PFC), constant curvature line array element.
Description
The CXA-12 enclosure is a constant curvature line array element designed for multiple configurations, with a maximum of 4 enclosures.
The CXA-12 uses one 12″ LF/MF speaker next to a custom Multidriver waveguide system. The enclosure is self-powered with a total of 1400W (Class D, witch mode power supply), with PFC system and DSP processor with linear phase FIR filters.
It is ideal for a wide variety of applications, its design allows you to configure installations with symmetrical dispersion or fly the boxes vertically. The enclosure has a complete range of accessories that facilitate its use both in touring as in fixed installations.
For low frequency support the CXA-18S subwoofer is also available, either to be flown or stacked with the CXA-12 without the need for any rigging accesories.
Perfectly suited for:
| → Live events |
| → Clubs |
| → Theatres |
| → Houses of worship |
| → Fixed installations |
| → Touring |
Technical Data
Components |
LF: 12″, 2.5″ voice coil, Malt Cross Cooling System |
HF: custom Multidriver system with wave guide, 1.4″ aluminium voice coil with titanium diaphragm |
|
| Frequency Range | 60 Hz – 20 KHz (-10dB) |
Frequency Response |
70 Hz – 18 KHz (± 3dB) |
| Max SPL | 128 dB |
Coverage Angle |
100º H x 18 º V |
| Power | 1400W Class D with switching power supply & PFC |
LF Amplifier |
1 x 800 W |
| HF Amplifier | 1 x 600 W |
Processing |
Internal Lynx Processor DSPB-FL.
|
| Control | User control interface with 2.8″ IPS screen |
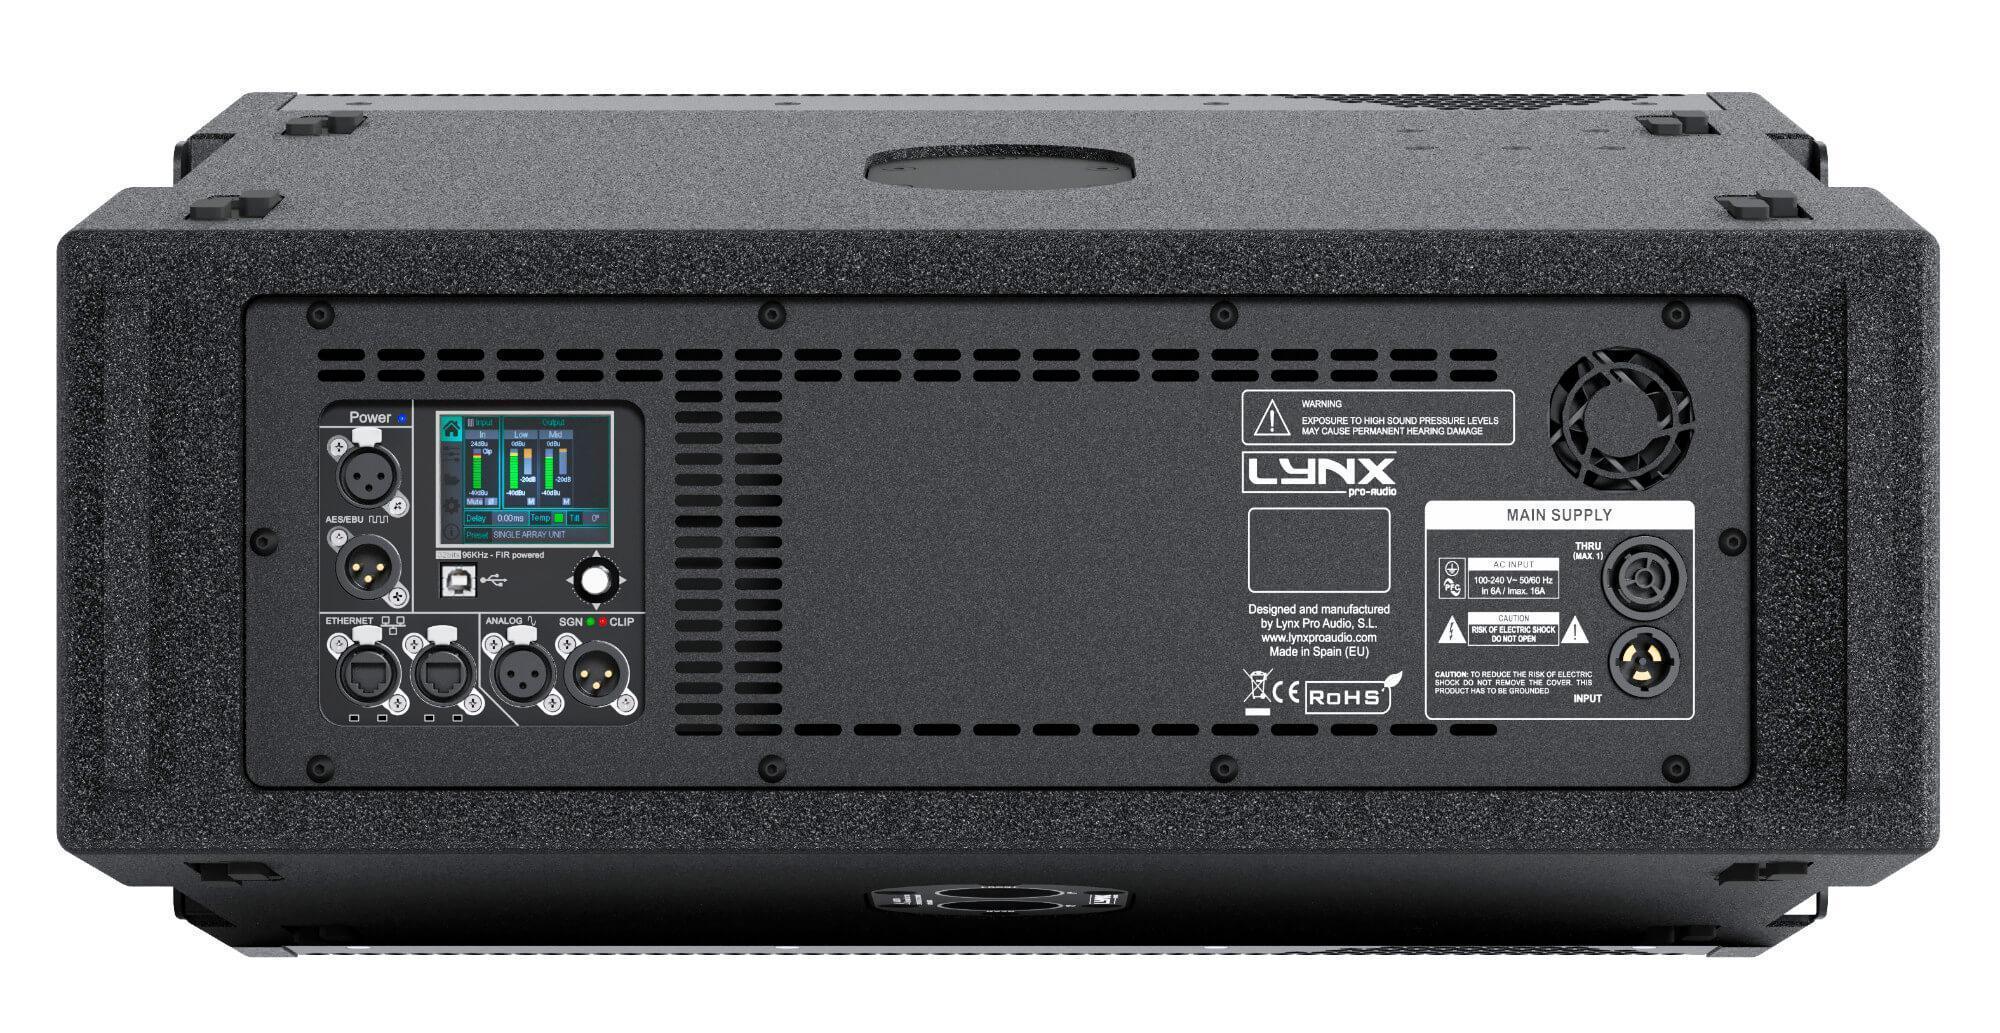
Control Connections |
Ethernet (OCS) / USB (DSP updating) |
Input |
Analog / AES3 (optional) |
| AC Power | 90 – 264V. 50/60 Hz with PFC |
AC Connections |
16A Neutrik powerCon TRUE1 TOP with looping output |
| Finish | Polyurea coating, black colour |
Material |
15 mm premium birch plywood |
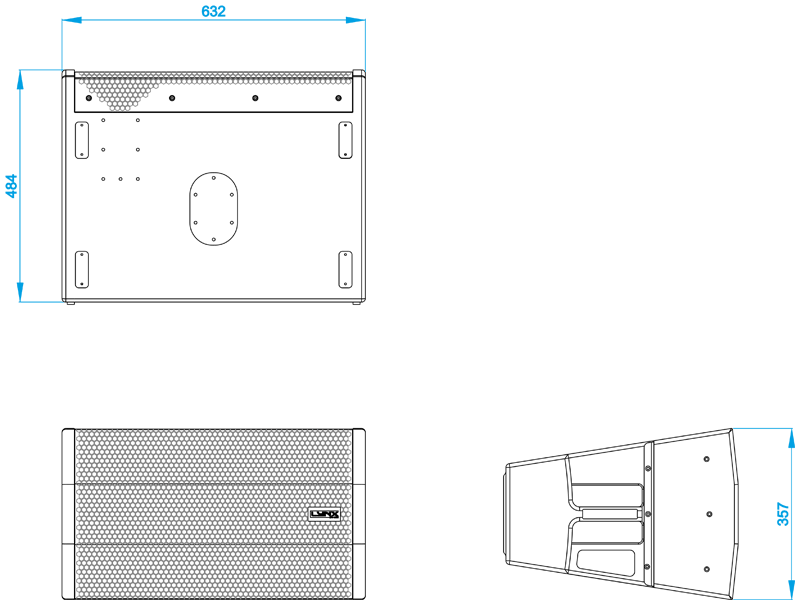
| Dimensions | 357 x 632 x 484 mm (H x W x D) |
Weight |
31 kg (68 lbs) |
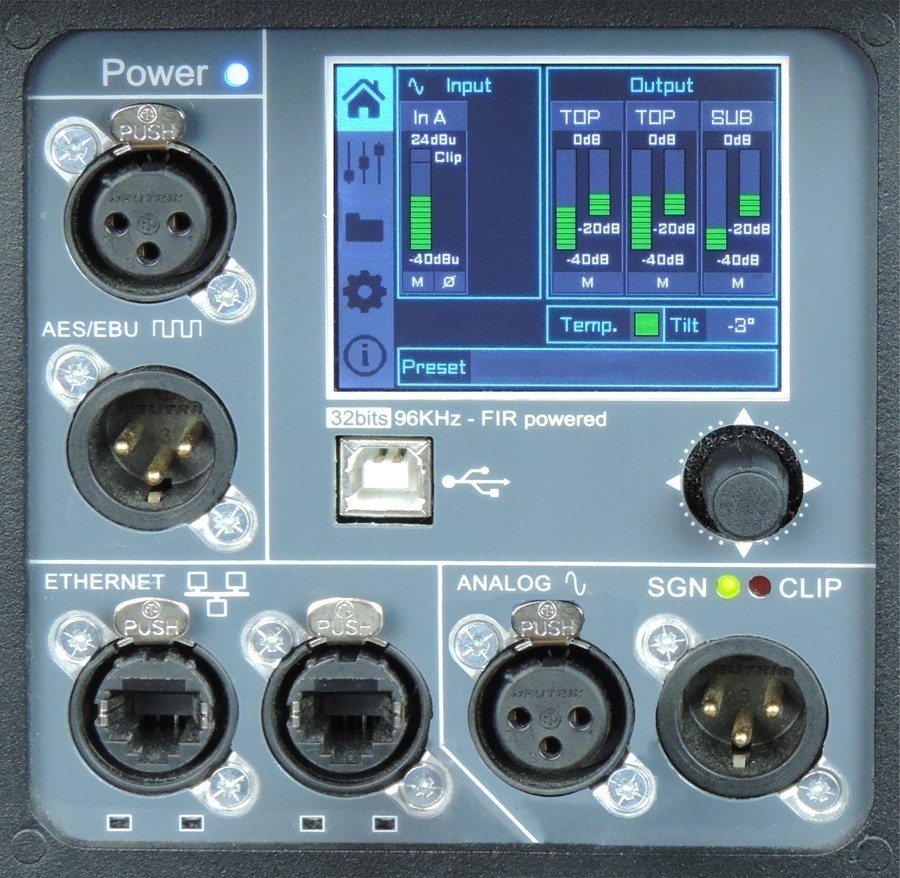
 DSP configuration
DSP module configuration panel
On the back pannel of the cabinet you will find the digital control area. From the compact joystick located below the screen you are able to configure the basic adjustment functions of the internal DSP.
Just move the joystick to select the icons on the left of the screen. You can enter into the following functions: Home, settings, folder, configuration and information. Please note that you must apply the desired configuration in each one cabinet and requires electrical power to work.
If changes are not made the display will automatically dim to avoid unnecessary light in situations where light is not wanted. To re-activate the light simply press the joystick.
The following screens are an example and may vary slightly for each cabinet.
Configuration panel:
 |
HOME On the main screen you can see the cabinet’s input and output: • Input: You can see a vumeter with the input level and a clip signal. • Output: You have a vumeter with the output level (0 dBu is the amp’s maximum level) You can check the compressor and control the dynamic activity. |
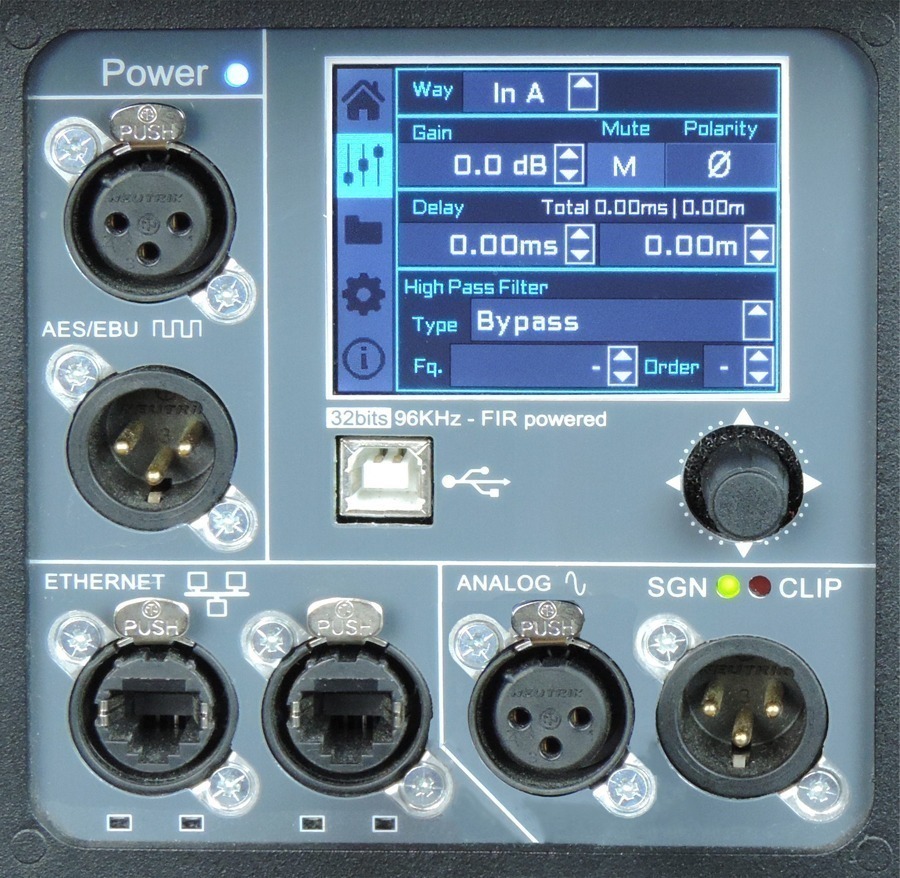 |
SETTINGS This panel allows you to change the gain, polarity, mute and the delay for the inputs. You also have the possibility of putting a high pass, changing the type of filter, frequency and order.
|
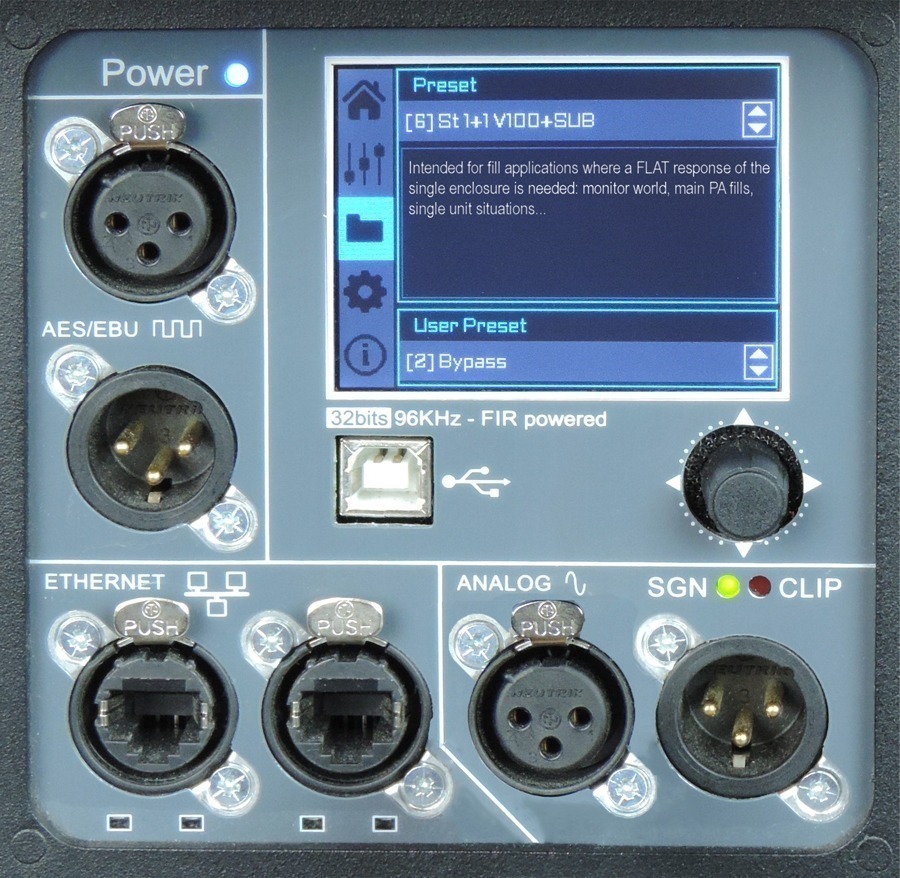 |
FOLDER The folder screen shows you the name of the preset and its description. Using the joystick you can change the preset. |
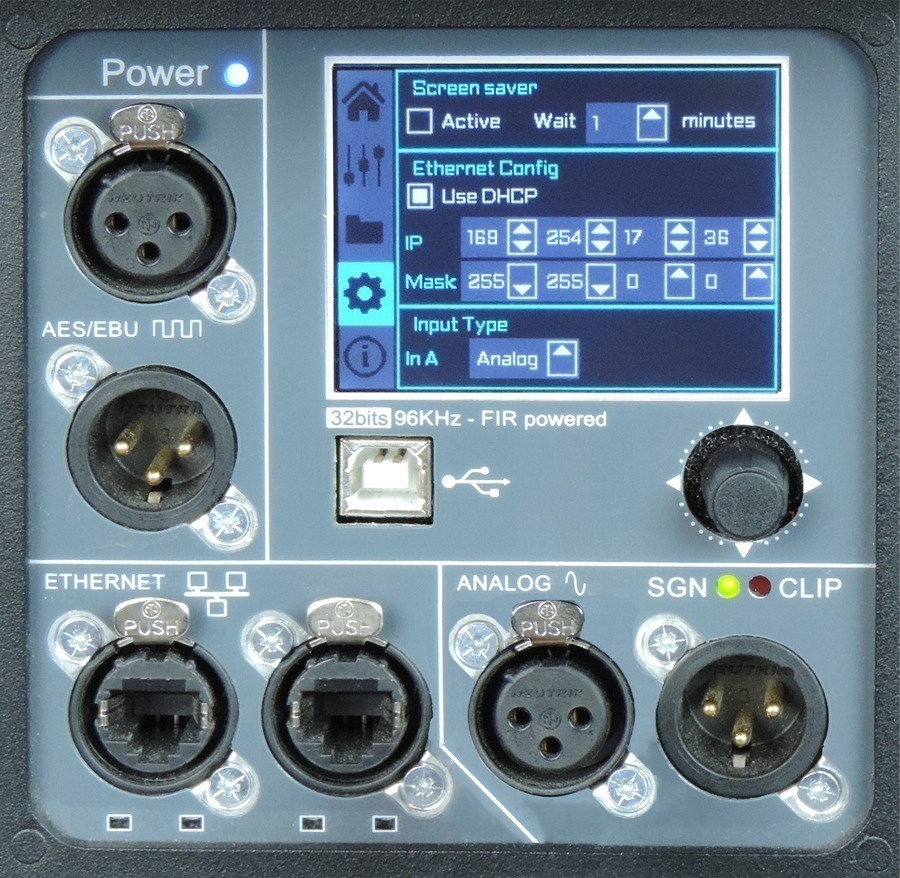 |
CONFIGURATION This screen is to configurate Ethernet. You can choose automatic or manual. You can also configure the screen saver. And here you have the input selection. You can choose between analog or AES3 for channel 1 or channel 2. |
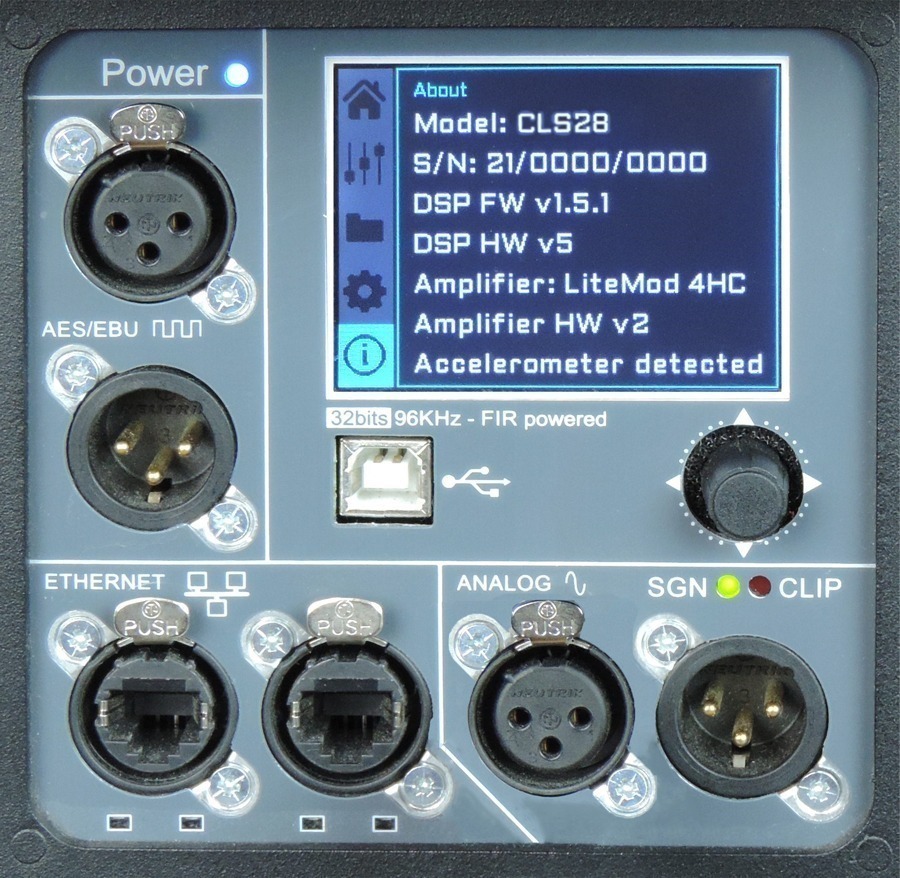 |
INFORMATION The last screen shows you some general information regarding the cabinet’s components. Here you can see the cabinet model, its serial number, DSP firmware and hardware versions, amp module model with hardware version, as well as the accelerometer status. |
Watch the following TUTORIAL to understand how it works:

DSP module configuration panel
On the back panel of the cabinet you will find the digital control area. From the compact joystick located below the screen you are able to configure the Basic adjustment functions of the internal DSP.
Just move the joystick to select the icons on the left of the screen. You can enter into the following functions: Home, settings, folder, configuration and information. Please note that you must apply the desired configuration in each one cabinet and requires electrical power to work.
If changes are not made the display will automatically dim to avoid unnecessary light in situations where light is not wanted. To re-activate the light simply press the joystick.
The following screens are an example and may vary slightly for each cabinet.
HOME
On the main screen you can see the cabinet’s input and output.
• Input: You can see a vumeter with the input level and a clip signal.
• Output: You have a vumeter with the output level (0 dBu is the amp’s maximum level) You can check the compressor and control the dynamic activity.
SETTINGS
This panel allows you to change the gain, polarity, mute and the delay for the inputs.
You also have the possibility of putting a high pass, changing the type of filter, frequency and order.
FOLDER:
The folder screen shows you the name of the preset and its description.
Using the joystick you can change the preset.
CONFIGURATION:
This screen is to configurate Ethernet. You can choose automatic or manual. You can also configure the screen saver.
And here you have the input selection. You can choose between analog or AES3 for channel 1 or channel 2.
INFORMATION:
The last screen shows you some general information regarding the cabinet’s components.
Here you can see the cabinet model, its serial number, DSP firmware and hardware versions, amp module model with hardware version, as well as the accelerometer status.
Watch the following TUTORIAL to understand how it works:
More features
Hardware for CXA-12
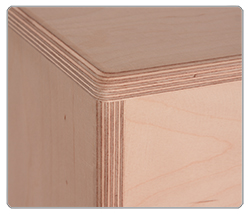 |
EnclosureThe CXA-12 cabinet is constructed from 11-ply premium birch plywood (15mm thickness) and finished with polyurea coating. |
 |
Internal designThe internal structure of the GXR-LA10A is heavily braced for greater longevity and all parts are assembled on metal inserts with metric screws. The amplification modules & DSP are housed in a separate chamber to the drivers avoiding excessive heat & vibration, thus delivering greater efficiency and reliability. |
 |
Rear panelThe powder coated steel rear panel contains all connections and houses the CXA-12s amplification modules and DSP, is easily accessible and housed separately from the drivers for increased reliability and efficiency. |
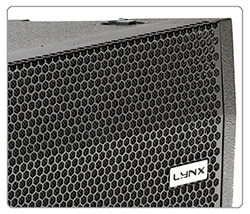 |
GrillThe CXA-12 has a heavy duty, powder coated front grille with a special acoustic rear fabric to protect the transducers against dust and dirt. |
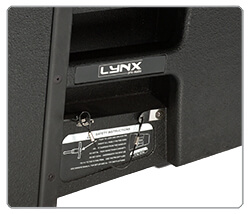 |
HandlesHandles are integrated in to the side plates of the CXA-12 to facilitate transport, positioning and loading of the cabinets. |
 |
RiggingIntegrated flying plates are located on each side of the enclosure, to link CXA-12 cabinets together with optional splay angles, from between 0° to 6° with 0.5° step increments to create the desired curve. |
Accessories for CXA-12
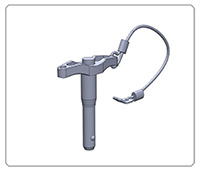 |
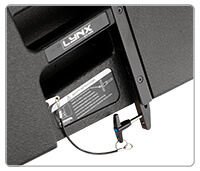
BALL-PSR0630 Ball pin with thread for CXA-12 and CXA-18S cabinets |
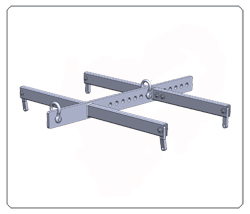 |
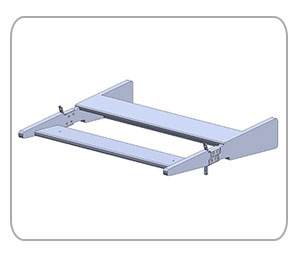
SV-CXA Flying frame for the CXA-12 with a capacity for rigging of up to 6 cabinets |
 |
FD-2CXA12 Rain cover for 2 CXA-12 |
 |
FFC-2CXA12 & C-3CXA12 Flight case to transport 2 and 3 CXA-12 |
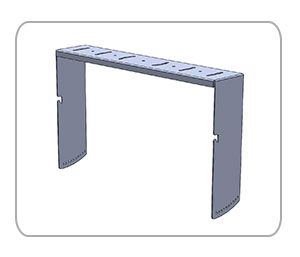 |
UBR-CXA12 Ceiling Bracket for CXA-12 |
 |
ST-CXA 0º stack adaptor for either the CXA-12 or the CXA-18S together with CXA-12 |
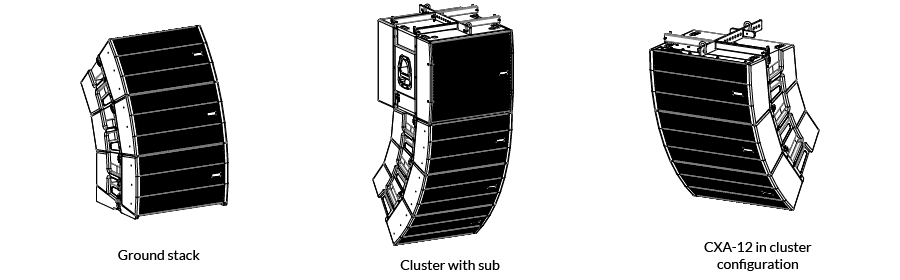
Multiple applications for CXA-12
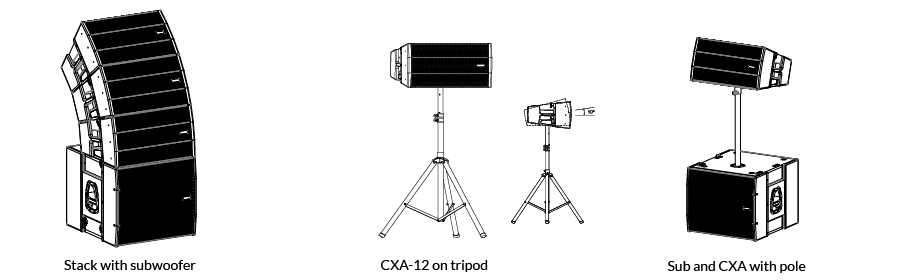
Install version
CXA-12IN
 |
The CXA-12IN is the install version of the CXA-12 cabinet. This version is specially designed for fixed installations. Flying frame SV-CXAIN is an unique accessory for this version, it allows you to choose between three different positions to change the array’s inclination in a more easier way. You will find more about this feature in the manual. |
CXA-12IN
The CXA-12IN is the install version of the CXA-12 cabinet. This version is specially designed for fixed installations.
Flying frame SV-CXAIN is an unique accessory for this version, it allows you to choose between three different positions to change the array’s inclination in a more easier way.
You will find more about this feature in the manual.
Featured references

Lynx Pro Audio at Valencia Basketball arena
The Fuente de San Luis arena is the home of Valencia Basket and the sound system in the stadium is exclusively Lynx Pro…
Read more
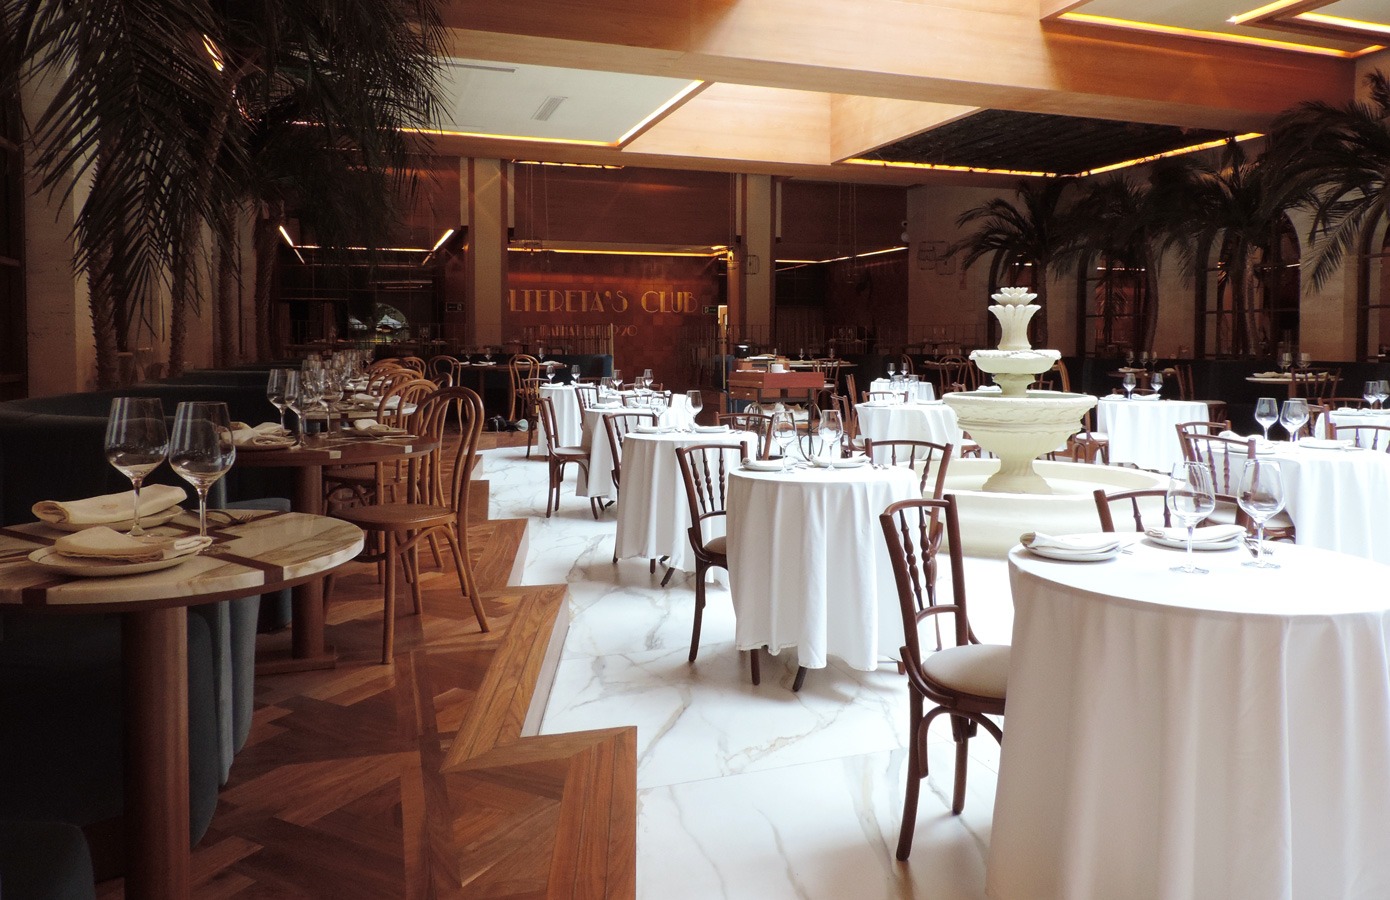
Welcome to the 20s: Voltereta Manhattan
If you want to dine at Voltereta Manhattan you need to book well in advance. This restaurant has quickly become one of the most popular places to eat in the city.
Read more
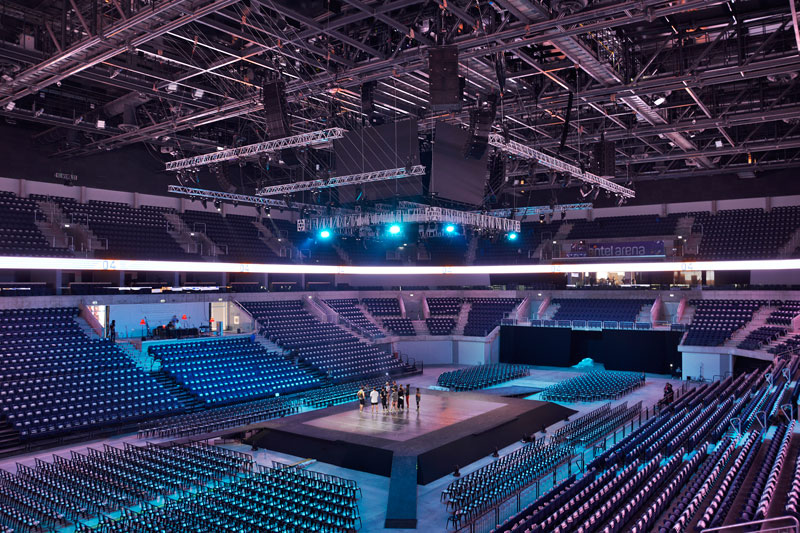
Gutenberg: a 360-degree show in Montevideo
On November 24, ‘Gutenberg’ premiered at Antel Arena in Montevideo (Uruguay), a 360-degree show and the most ambitious of the season…
Read more
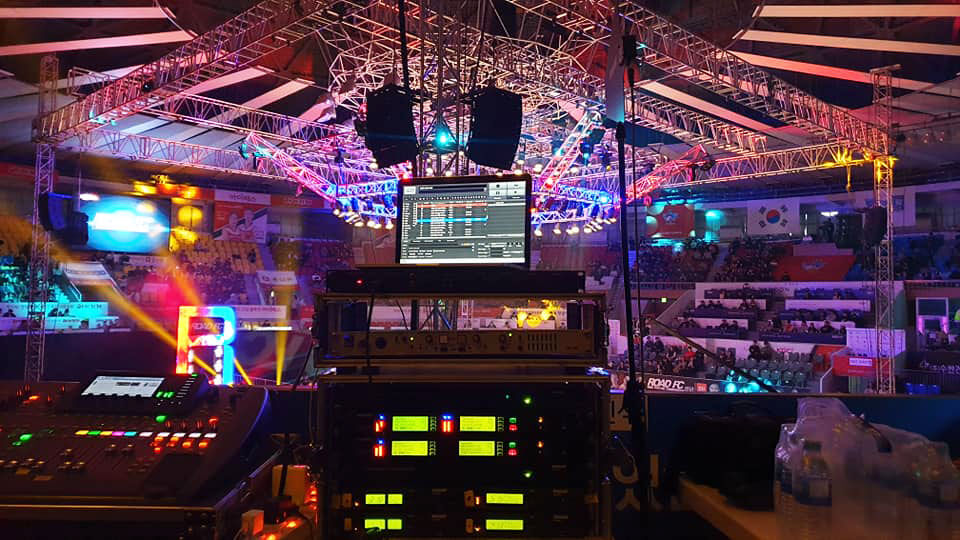
Road Fighting Championship in Daejeun, South Korea
Last November 3 took place the Road Fighting Championship (Road FC), a South Korean championship based on mixed martial arts (MMA)…
Read more